How to Install the Build on Minecraft Quickly

Preparing to Install a Minecraft Build
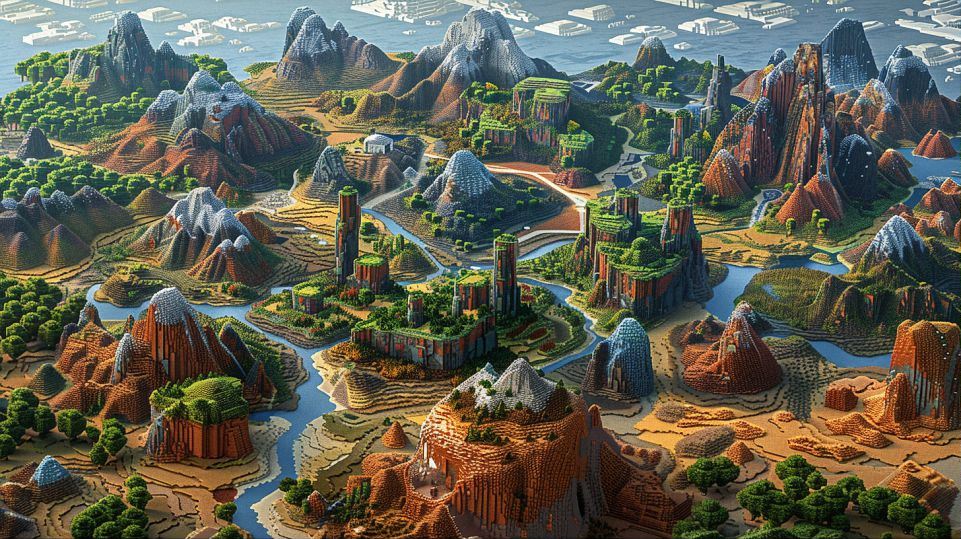
Understanding Minecraft Builds: What Are They?
When it comes to Minecraft, creativity knows no bounds. A Minecraft build is essentially a pre-designed structure or set of structures that you can import into your game. These builds can range from simple houses to elaborate castles, intricate cities, or even entire worlds designed by other players. Think of them as blueprints or templates that can enhance your gaming experience by saving you time and providing inspiration for your own creations.
Contents
ToggleMinecraft builds are shared by players across various platforms, including websites like Planet Minecraft and Minecraft Schematics. They come in different formats, such as .schematic or .mcworld files, depending on whether you’re playing Minecraft Java Edition or Minecraft Bedrock Edition. Understanding what a Minecraft build is and the different formats available is the first step in making your Minecraft world truly unique.
Required Tools and Resources for Installation
Before diving into the installation process, it’s crucial to gather all the necessary tools and resources. Here’s a quick checklist to get you started:
- Minecraft Game: Ensure you have Minecraft installed on your device. The installation process varies slightly between the Java Edition and the Bedrock Edition, so make sure you know which version you’re using.
- File Compression Software: Programs like WinRAR or 7-Zip are essential for extracting downloaded build files, which are often compressed in .zip or .rar formats.
- Minecraft World Editor: Tools like MCEdit or WorldEdit (Java Edition) can be extremely helpful. For Bedrock Edition, you might need apps like MCC Tool Chest.
- Internet Access: A stable internet connection is necessary to download the build files from reputable websites.
- Backup Software: Before making any changes, it’s wise to back up your current Minecraft worlds. This ensures that you can revert to your original game state if anything goes wrong.
Safety Tips for Downloading Builds
While the internet is a treasure trove of Minecraft builds, it’s important to tread carefully to avoid malware or corrupted files. Here are some safety tips to keep in mind:
- Download from Trusted Sites: Stick to well-known Minecraft community websites like Planet Minecraft, Minecraft Forum, or official Minecraft Marketplace for Bedrock Edition. These sites have a reputation for quality and safety.
- Read Reviews and Ratings: Before downloading a build, check the user reviews and ratings. Builds with high ratings and positive feedback are generally safer and better in quality.
- Scan for Viruses: Always run a virus scan on downloaded files before opening them. Most antivirus programs can quickly check for any malicious content.
- Backup Your Worlds: As mentioned earlier, always back up your Minecraft worlds before adding new builds. This way, you can restore your game if something goes wrong during the installation.
- Check File Formats: Ensure the build file format is compatible with your version of Minecraft. Java Edition uses .schematic files, while Bedrock Edition often uses .mcworld files.
By following these steps and precautions, you’ll be well on your way to safely and successfully installing a Minecraft build. So, get ready to explore new worlds and let your creativity shine!

Step-by-Step Guide to Installing a Minecraft Build
Finding and Downloading Your Desired Build
The first step in learning how to install the build on Minecraft is finding a build that excites you. There are numerous platforms where you can browse and download Minecraft builds. Popular sites include Planet Minecraft, Minecraft Schematics, and CurseForge. These websites offer a wide range of builds, from medieval castles to futuristic cities, and even entire adventure maps.
When you find a build you like, look at the details provided by the creator. Check the compatibility with your Minecraft version (Java or Bedrock) and read any instructions or requirements listed. Once you’ve confirmed that the build suits your needs, download the file. Build files typically come in compressed formats like .zip or .rar. Make sure you have a file compression tool such as WinRAR or 7-Zip to extract these files.
Installing Builds on Minecraft Java Edition
Installing builds on Minecraft Java Edition is straightforward but requires a few steps:
-
Extract the Downloaded File: Use your file compression tool to extract the contents of the
.zipor.rarfile you downloaded. You should see a folder containing various files, including a.schematicfile if you’re using a world editor. -
Locate Your Minecraft Saves Folder: Open your Minecraft game and click on “Options” >, “Resource Packs” >, “Open Resource Pack Folder.” This will open the Minecraft directory. Navigate up one level to find the
savesfolder. -
Copy the Build Folder: Move or copy the extracted build folder into the
savesfolder. -
Launch Minecraft: Start Minecraft, go to “Singleplayer,” and you should see your new build listed as a world. Select it and click “Play.”
If your build came as a .schematic file, you’ll need to use a world editor like MCEdit:
- Open MCEdit: Launch MCEdit and load the world where you want to place the build.
- Import the Schematic: Use the “Import” feature to select the
.schematicfile and place it in your world. - Save and Exit: Save your changes and exit MCEdit. Your build will now appear in your Minecraft world.
Installing Builds on Minecraft Bedrock Edition
For Minecraft Bedrock Edition, the process is a bit different:
-
Extract the Downloaded File: Just like with Java Edition, extract the contents of the
.zipor.rarfile. You should find a folder or a.mcworldfile. -
Import the World: If you have a
.mcworldfile, simply double-click it. This action will automatically launch Minecraft and import the build into your game as a new world. -
Manual Installation: If you have a folder instead of a
.mcworldfile, you’ll need to move it manually:- Open the
com.mojangfolder. On Windows, this is usually found inC:Users[YourUsername]AppDataLocalPackagesMicrosoft.MinecraftUWP_8wekyb3d8bbweLocalStategamescom.mojangminecraftWorlds. - Copy the extracted build folder into the
minecraftWorldsdirectory.
- Open the
-
Launch Minecraft: Open Minecraft, go to “Play,” and you should see your new world listed. Select it and start exploring.
Troubleshooting Common Installation Issues
Sometimes, things don’t go as smoothly as planned. Here are some common issues and how to fix them:
-
Build Not Showing Up: If your build isn’t appearing in Minecraft, double-check that you placed the files in the correct directory. Ensure that the folder structure is correct and that there aren’t extra nested folders.
-
Version Compatibility: Ensure the build you downloaded is compatible with your version of Minecraft. Some builds may require specific Minecraft versions or mods.
-
Corrupted Files: If the build crashes your game or behaves strangely, the files might be corrupted. Try downloading the build again from a reputable source.
-
MCEdit Issues: If MCEdit isn’t working correctly, make sure you have the latest version. Sometimes, older versions may not support new Minecraft updates.
By following these steps and keeping these troubleshooting tips in mind, you can enjoy a seamless experience in installing and exploring new Minecraft builds. Happy building!

Exploring and Customizing Your New Minecraft Build
Navigating Your New Build: Tips and Tricks
So, you’ve successfully installed your new Minecraft build, and you’re eager to dive in. Navigating a new build can be both exciting and a bit overwhelming, especially if it’s a large or complex structure. Here are some tips and tricks to help you explore your new domain like a pro:
-
Start at the Spawn Point: Every build has a designated spawn point where you’ll first appear. Begin your exploration from here to get a sense of direction and layout. Take note of any signs or paths that might guide you.
-
Use Maps and Coordinates: If your build includes a map, use it! Maps can help you navigate large builds without getting lost. Additionally, press F3 (Java Edition) or use the coordinates feature in Bedrock Edition to track your position.
-
Check Out Key Areas: Most builds have key areas such as main halls, central towers, or designated rooms. Make a point to visit these areas first to understand the build’s central features and design.
-
Look for Hidden Details: Builders often include secret rooms, hidden passages, and Easter eggs. Keep an eye out for odd blocks or buttons that might reveal hidden areas.
-
Use Creative Mode: If you’re in Survival mode and finding it tough to explore, switch to Creative mode. This allows you to fly around and get a bird’s-eye view of the entire build, making it easier to understand the layout.
Customizing and Expanding the Build
Now that you know your way around, it’s time to make this build your own. Customizing and expanding your Minecraft build can be immensely satisfying. Here’s how you can put your personal touch on it:
-
Add Personal Touches: Decorate rooms with your favorite items, furniture, and color schemes. Use banners, paintings, and custom signs to add a unique flair.
-
Expand the Structure: Extend the build by adding new rooms, towers, or even entire wings. Whether you’re building a new library or an underground dungeon, expanding allows you to put your creative stamp on the build.
-
Upgrade Materials: Replace existing materials with rarer or more aesthetically pleasing ones. Swap out cobblestone for polished stone or add stained glass windows to brighten up the interiors.
-
Redstone Enhancements: Integrate Redstone mechanisms to add functionality. Automated doors, hidden traps, and lighting systems can make your build more interactive and fun.
-
Landscape and Environment: Don’t forget the surroundings. Add gardens, fountains, or even a moat. Landscaping around your build can enhance its overall look and feel.
Sharing and Showcasing Your Build with Friends
One of the best parts of Minecraft is sharing your creations with others. Showcasing your build can be incredibly rewarding and inspire others in the community. Here’s how to do it:
-
Take Screenshots: Capture high-quality screenshots of your build from different angles. Use the F2 key on Java Edition or the built-in screenshot feature on Bedrock Edition.
-
Create a Video Tour: Use screen recording software to create a video tour of your build. Narrate as you go, highlighting key features and any interesting stories behind the construction.
-
Share on Social Media: Post your screenshots and videos on platforms like Twitter, Instagram, and Reddit. Join Minecraft communities to reach a wider audience and get feedback.
-
Upload to Build-Sharing Sites: Websites like Planet Minecraft and Minecraft Schematics allow you to upload your build for others to download. Include a detailed description, version compatibility, and any special instructions.
-
Invite Friends to Explore: If you’re playing on a multiplayer server, invite your friends to explore your build. Host a virtual tour or even a themed event in your new creation.
By exploring, customizing, and sharing your Minecraft build, you not only enhance your own gaming experience but also contribute to the vibrant Minecraft community. So, grab your pickaxe, unleash your creativity, and let the adventures begin!