Shaders for Minecraft 120: Top Picks and Tips
Exploring the Best Shaders for Minecraft 1.20
Understanding Shaders: What They Do and Why They Matter
Shaders for Minecraft 1.20 can transform your gameplay experience. But what exactly are shaders, and why do they matter? In simple terms, shaders are tools that enhance the visual quality of Minecraft. They add effects such as realistic lighting, shadows, reflections, and even movement in water and leaves. These effects make the blocky world of Minecraft look more like a cinematic experience.
Contents
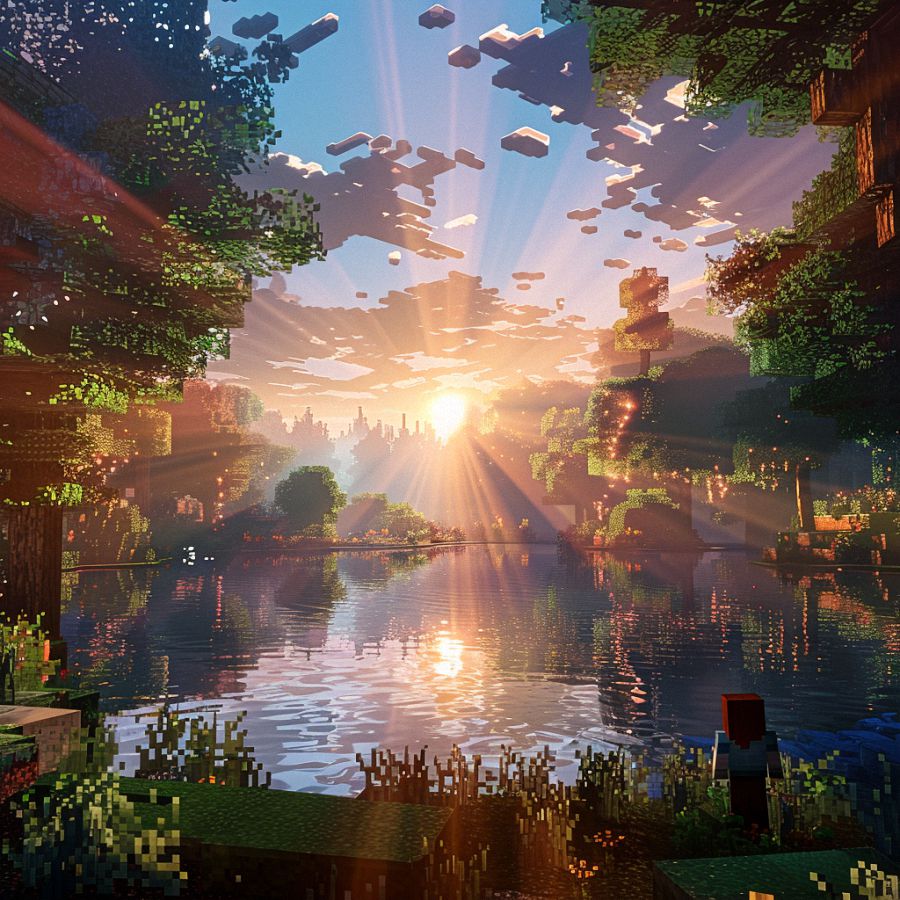
ToggleWhy do shaders matter? For many players, the basic graphics of Minecraft can start to feel a bit dull over time. Shaders breathe new life into the game by adding layers of visual depth and beauty. Imagine walking through a forest where the sunlight filters through the leaves, creating dappled shadows on the ground. Or standing by the ocean at sunset, with waves that glisten and reflect the colors of the sky. These experiences make Minecraft more immersive and enjoyable.
Moreover, shaders can help highlight the creativity and effort players put into building their worlds. Detailed structures and landscapes look even more impressive with realistic lighting and shadows. In essence, shaders elevate Minecraft from a simple game to a stunning visual adventure.
Key Features of Minecraft 1.20 Shaders: Performance and Visuals
Minecraft 1.20 shaders come with a range of features that enhance both performance and visuals. Here are some of the key elements you can expect:
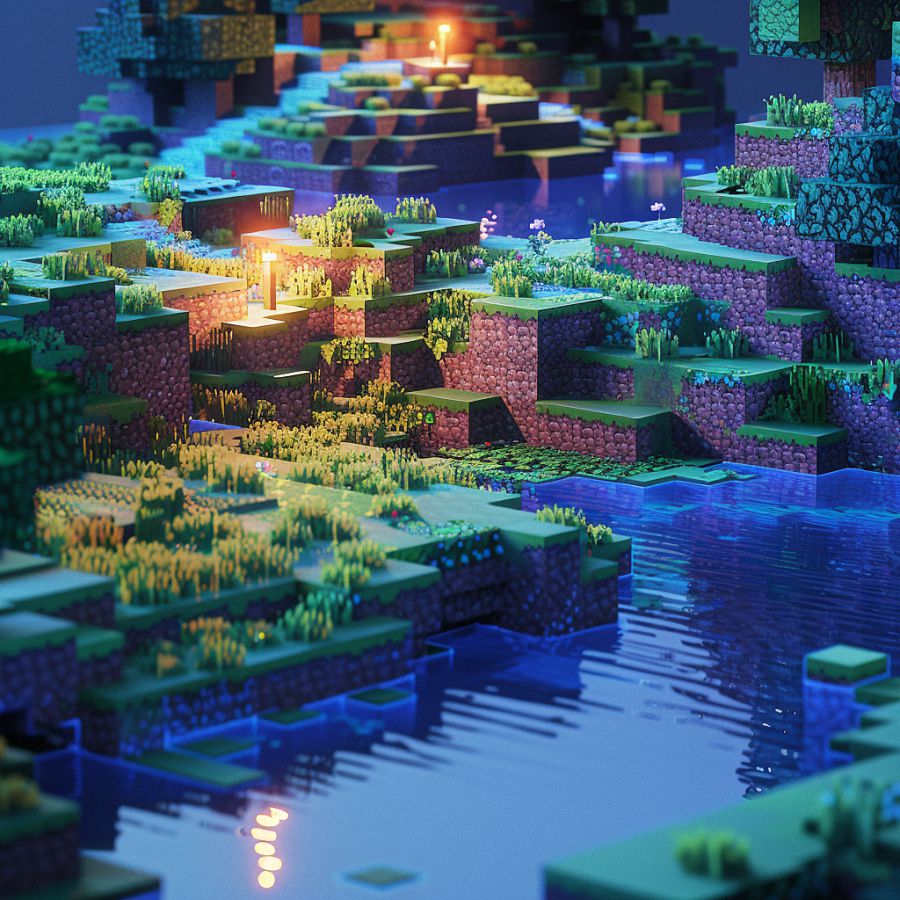
1. Realistic Lighting and Shadows: Shaders like SEUS (Sonic Ether’s Unbelievable Shaders) offer advanced lighting techniques that simulate real-world light behavior. This includes dynamic shadows that change with the time of day and light sources that cast realistic glows.
2. Enhanced Water Effects: Shaders such as Sildur’s Vibrant Shaders bring water to life with reflections, waves, and realistic motion. The water becomes more than just a blue surface, it looks and behaves like actual water.
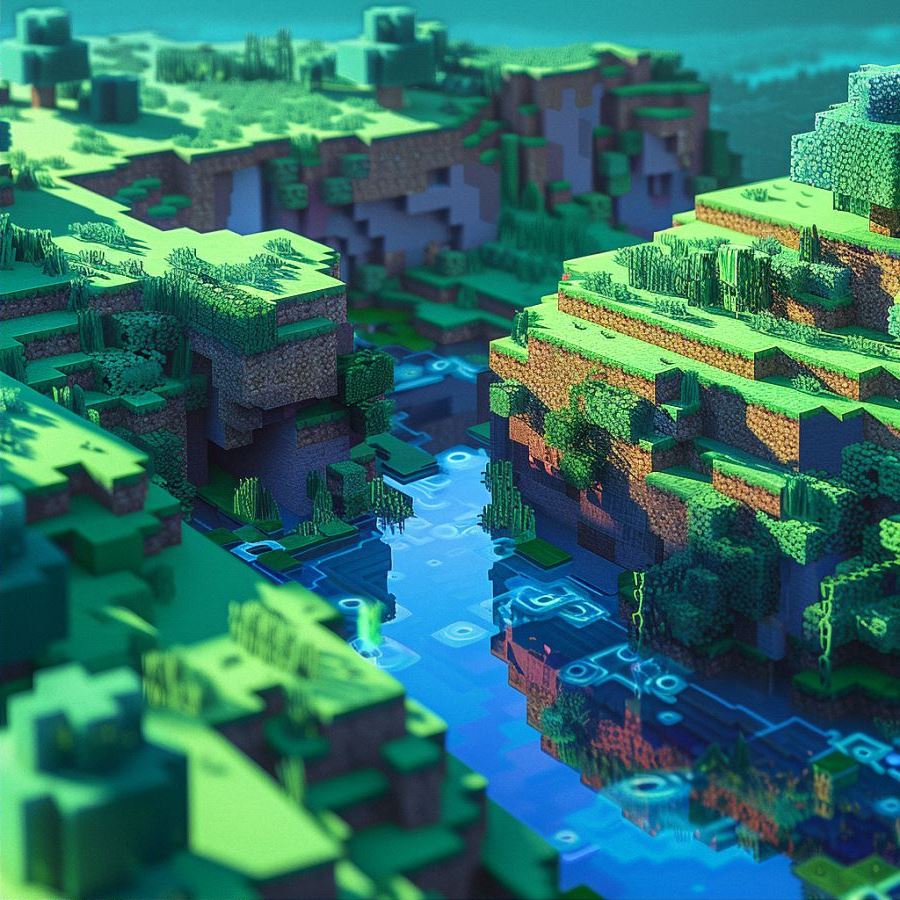
3. Improved Textures: With shaders, textures in Minecraft can become more detailed and vibrant. BSL Shaders, for example, enhance the texture quality without significantly impacting performance, making everything from grass to stone look more lifelike.
4. Atmospheric Effects: Shaders can add fog, rain, and even snowfall with realistic effects. Continuum Shaders are known for their atmospheric enhancements, which make weather conditions feel more immersive.
5. Customization Options: Many shaders, including KUDA Shaders, offer extensive customization. Players can adjust settings to balance visual quality and performance, ensuring that their game runs smoothly even with the most stunning effects enabled.
Shader Installation Guide for Minecraft 1.20
Installing shaders for Minecraft 1.20 might sound tricky, but it’s actually quite straightforward. Follow these steps to get started:
1. Install OptiFine: First, you need OptiFine, a mod that enhances Minecraft’s graphics and performance. Download the latest version of OptiFine for Minecraft 1.20 from the official OptiFine website. Run the installer and follow the prompts to install it.
2. Download Your Chosen Shaders: Next, choose the shaders you want to use. Popular options include SEUS, Sildur’s Vibrant Shaders, BSL Shaders, Continuum Shaders, and KUDA Shaders. Visit their respective websites and download the shader packs.
3. Move Shaders to the Shaders Folder: Open Minecraft and go to the Options menu. Click on Video Settings, then Shaders. This will open the Shaders folder. Move your downloaded shader packs into this folder.
4. Activate the Shaders: Back in Minecraft, you should now see your shader packs listed. Click on the one you want to activate, and then click Done. Your game will reload with the new shaders applied.
5. Adjust Settings if Needed: Depending on your computer’s performance, you might need to tweak the shader settings. Go back to the Shaders menu, click on Shader Options, and adjust the settings to balance performance and visual quality.
With these steps, you’ll be able to transform your Minecraft 1.20 experience with stunning shaders. Whether you’re exploring caves, building cities, or just enjoying a sunset, shaders add a whole new level of beauty to your game.
Top Shaders for Minecraft 1.20: A Detailed Look
SEUS (Sonic Ether’s Unbelievable Shaders): Realism at Its Best
SEUS, short for Sonic Ether’s Unbelievable Shaders, is renowned for its breathtaking realism. Imagine walking through a Minecraft forest where sunlight streams through the trees, casting realistic shadows on the ground. This shader pack brings your game to life with advanced lighting techniques that mimic real-world light behavior.
One standout feature of SEUS is its dynamic weather effects. Rain looks genuinely wet, with droplets creating realistic ripples on the water. When it stops raining, the world feels refreshed, with water gradually evaporating under the sun’s warmth. Nighttime is equally impressive, as SEUS makes moonlight glow softly, casting gentle shadows that add to the ambiance.
Moreover, SEUS doesn’t just enhance the environment, it also improves the appearance of player-built structures. Buildings made of wood, stone, or glass take on new dimensions with realistic reflections and refractions. This shader pack is perfect for players looking to add a cinematic touch to their Minecraft adventures.
Sildur’s Vibrant Shaders: Balancing Performance and Beauty
Sildur’s Vibrant Shaders are celebrated for their ability to balance stunning visuals with smooth performance. This makes them an excellent choice for players who want beautiful graphics without compromising their game’s frame rate.
What makes Sildur’s Shaders unique is their versatility. They come in various versions, from Lite to Extreme, allowing you to choose the best fit for your hardware. Even the Lite version offers noticeable improvements, with enhanced lighting, shadows, and water effects.
In addition to visual enhancements, Sildur’s Shaders introduce a host of customization options. You can tweak everything from shadow quality to water reflections, ensuring that your game looks exactly how you want it. This flexibility makes Sildur’s Shaders a favorite among Minecraft players who appreciate both aesthetics and performance.
BSL Shaders: Enhancing Visuals Without Compromising FPS
BSL Shaders strike a remarkable balance between visual fidelity and game performance. Designed to be efficient, these shaders enhance the game’s graphics without causing significant frame rate drops, making them ideal for players with mid-range PCs.
One of the key features of BSL Shaders is their realistic lighting. The sun casts warm, lifelike rays, while the moon and stars light up the night sky with a soft glow. Shadows are sharp and dynamic, responding to the game’s day-night cycle seamlessly.
BSL Shaders also excel in water rendering. Rivers and oceans become vibrant, with clear reflections and subtle wave animations. This shader pack’s attention to detail extends to even the smallest aspects of the game, such as the way leaves rustle in the wind or how torches emit a gentle, flickering light. These enhancements create an immersive experience that’s hard to match.
Continuum Shaders: High Definition and Cinematic Quality
If you’re looking for a shader pack that offers high definition and cinematic quality, Continuum Shaders are the way to go. Known for their stunning visuals, Continuum Shaders transform Minecraft into a near-photorealistic experience.
The hallmark of Continuum Shaders is their advanced lighting system. Light interacts with the environment in complex ways, creating realistic reflections, refractions, and shadows. This shader pack also includes volumetric lighting, which adds depth and realism to fog, smoke, and other atmospheric effects.
Continuum Shaders are particularly impressive when it comes to textures. Blocks take on a lifelike appearance, with intricate details that make them look almost touchable. Water is another highlight, with waves that move realistically and reflect the surrounding environment. Although these shaders are resource-intensive, the visual payoff is worth it for those seeking the ultimate in Minecraft graphics.
KUDA Shaders: Stunning Visuals with Great Optimization
KUDA Shaders offer a fantastic blend of stunning visuals and great optimization. They enhance Minecraft’s graphics while maintaining good performance, making them accessible to a wide range of players.
One of the standout features of KUDA Shaders is their realistic sky. Clouds look fluffy and dynamic, changing shapes and colors throughout the day. Sunsets and sunrises are particularly breathtaking, with vibrant hues that paint the sky and reflect off the terrain.
KUDA Shaders also improve water rendering significantly. Lakes, rivers, and oceans look clearer and more reflective, adding to the realism of the game world. Additionally, this shader pack enhances shadows and lighting, giving the game a more natural and immersive feel.
Customization is another strong suit of KUDA Shaders. Players can adjust settings to find the perfect balance between visual quality and performance, ensuring a smooth gameplay experience even with the most beautiful graphics enabled. This makes KUDA Shaders a popular choice for players looking to enhance their Minecraft worlds without sacrificing performance.
Optimizing and Customizing Your Shader Experience
Adjusting Shader Settings for Optimal Performance
When it comes to shaders for Minecraft 1.20, finding the right balance between visual quality and game performance is key. If you’re experiencing lag or frame drops, tweaking the shader settings can make a huge difference. Start by lowering the shadow quality and reducing the render distance. High-quality shadows look great but can be very demanding on your hardware. By lowering their quality, you’ll free up resources for other effects.
Next, adjust the lighting settings. Many shader packs offer different types of lighting, from basic to advanced. Try switching to a less demanding option if your game is struggling. Turning off features like motion blur and depth of field can also boost performance significantly.
Additionally, tweaking water effects can help. While reflections and refractions add to the realism, they can be resource-intensive. Consider reducing the quality of water effects or disabling them altogether if performance is a priority. Don’t forget to check the anti-aliasing settings, too. Lowering or disabling anti-aliasing can result in smoother gameplay on lower-end systems.
Combining Shaders with Resource Packs for Unique Visuals
Combining shaders with resource packs is a fantastic way to create a unique visual experience in Minecraft 1.20. Resource packs change the textures of blocks and items, while shaders enhance the lighting, shadows, and effects. Together, they can transform the game’s aesthetics.
Start by selecting a resource pack that complements your chosen shader. For example, if you’re using SEUS, which focuses on realistic lighting, a high-resolution resource pack like Faithful or Realistico can enhance this effect. To apply a resource pack, download it and move it to the Resourcepacks folder in your Minecraft directory. Activate it through the game’s settings menu.
Once your resource pack is active, enable your shader pack. Pay attention to how the textures and lighting interact. Some combinations may require adjustments to get the best results. For instance, you might need to tweak the brightness or contrast settings in the shader menu to ensure that the resource pack’s textures don’t appear too dark or washed out.
Troubleshooting Common Shader Issues in Minecraft 1.20
Encountering issues with shaders in Minecraft 1.20? Don’t worry, troubleshooting common problems can be straightforward. One frequent issue is a drastic drop in frame rate. If this happens, first ensure that your graphics drivers are up to date. Outdated drivers can cause performance issues with shaders.
Another common problem is graphical glitches, like flickering shadows or missing textures. These can often be resolved by adjusting the shader settings. Try lowering the shadow quality or disabling certain effects like bloom or motion blur. If the problem persists, it might be an issue with compatibility between the shader and your version of Minecraft. Check for updates to the shader pack or consider switching to a different pack.
Sometimes, shaders can cause Minecraft to crash on startup. This is usually due to insufficient memory allocation. You can increase the allocated memory in the Minecraft launcher settings. Go to the Installations tab, select your Minecraft version, and click More Options. In the JVM Arguments box, increase the value next to -Xmx to allocate more RAM.
Advanced Tips for Shader Customization: Getting the Best Out of Your Game
For those looking to get the most out of their shader experience in Minecraft 1.20, advanced customization is the way to go. Start by exploring the shader options menu. Here, you’ll find a plethora of settings to fine-tune your visual experience.
One advanced tip is to customize the ambient occlusion settings. Ambient occlusion adds depth to shadows and can significantly enhance the realism of your game. Adjusting its intensity and radius can help achieve the perfect balance between visual quality and performance.
Another powerful customization is tweaking the bloom effect. Bloom makes bright areas glow, adding a soft, dreamy look to the game. While it’s visually appealing, too much bloom can be overwhelming. Fine-tune the bloom settings to suit your preference and ensure it complements the overall aesthetic.
For players with high-end PCs, consider enabling volumetric lighting and clouds. Volumetric lighting simulates how light scatters in the air, creating stunning sunbeams and realistic fog. Volumetric clouds, on the other hand, add a three-dimensional look to the sky, making sunsets and sunrises breathtaking.
Lastly, don’t forget about color grading. Many shaders offer options to adjust the color balance, saturation, and contrast. Experimenting with these settings can dramatically change the mood of your game, from vibrant and lively to moody and atmospheric.
By taking the time to explore and adjust these settings, you’ll be able to create a personalized and optimized shader experience that elevates your Minecraft 1.20 gameplay to new heights.